Red Velvet Cake for Valentine’s Day
Highlighted under: Sweet Inspiration
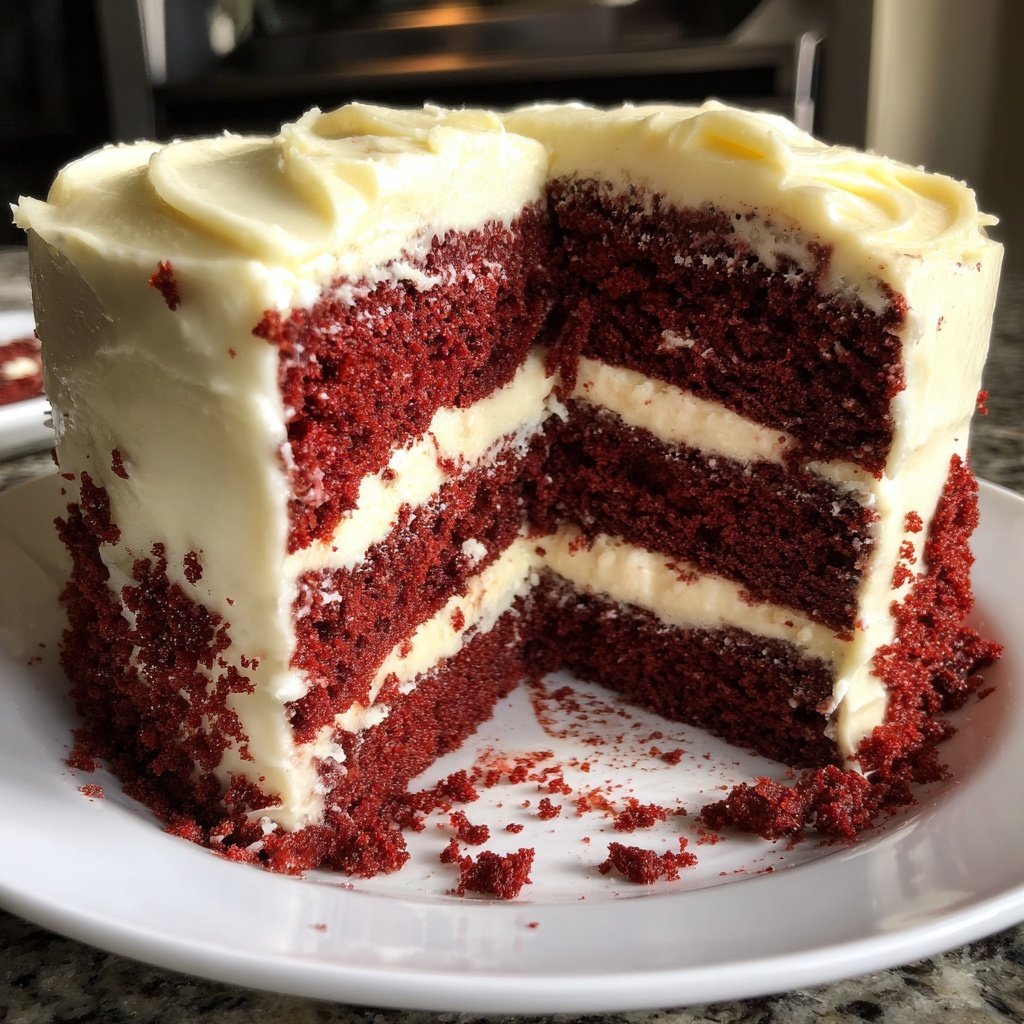
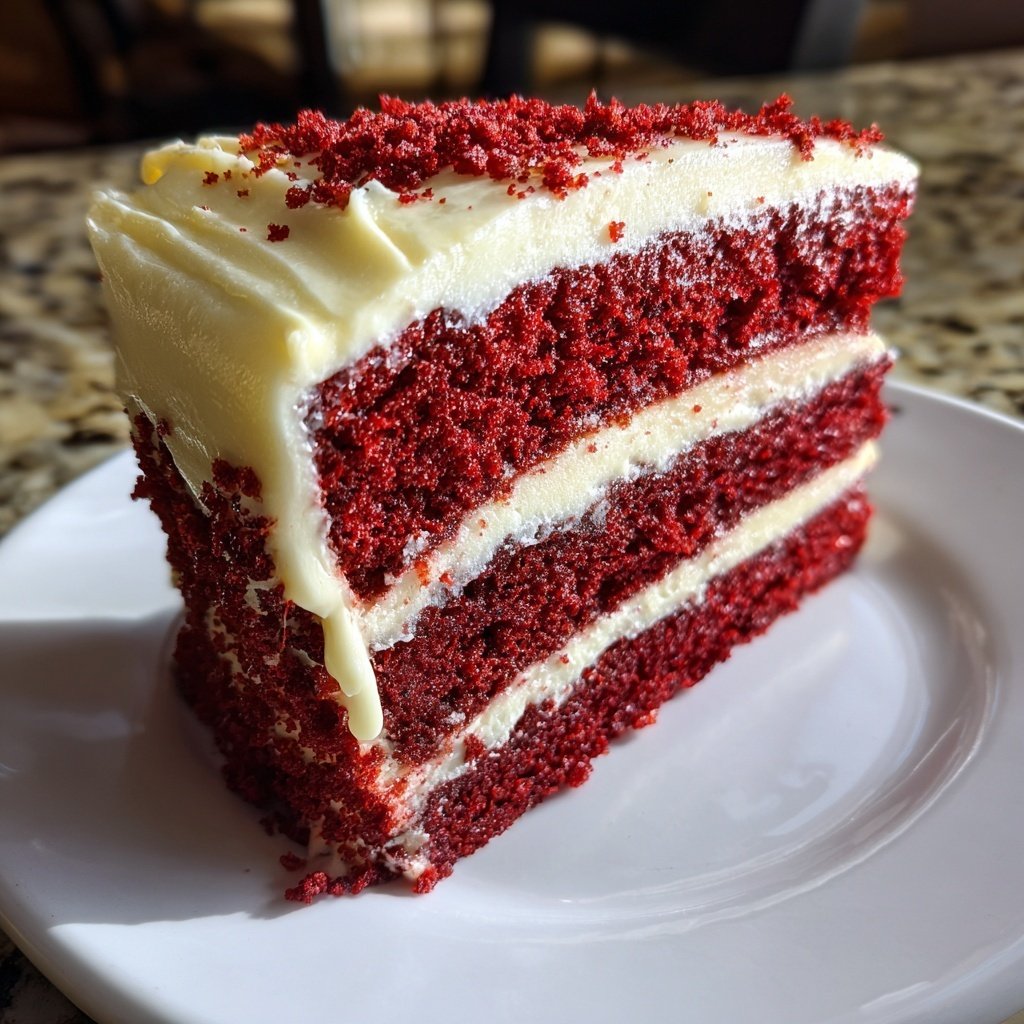
I absolutely love making Red Velvet Cake for Valentine’s Day! The vibrant red color and velvety texture make it a showstopper, perfect for impressing loved ones. This cake isn't just visually appealing; it’s deliciously flavored with a hint of cocoa and a tangy cream cheese frosting that brings everything together. There's something special about serving this cake; it feels like a symbol of love and celebration at any gathering. Plus, with a few secret twists I've discovered, you can elevate this classic recipe to new heights!
When I first made Red Velvet Cake, I was captivated by its unique flavor and stunning appearance. The combination of buttermilk and cocoa gives it a moist crumb, while the cream cheese frosting adds a tangy sweetness that balances perfectly. I find that letting the cake sit for a few hours before slicing improves the texture and allows the flavors to meld beautifully.
One of my favorite tips involves using a bit of vinegar and baking soda, which not only helps the cake rise but also enhances its iconic color. Don't be afraid to experiment with the frosting—adding a splash of vanilla or even a hint of almond extract can elevate the dish to a whole new level!
Why You'll Love This Recipe
- The deep red color brings a festive touch to any celebration.
- Rich and moist texture that leaves a lasting impression.
- Perfectly tangy cream cheese frosting that complements the cake perfectly.
Understanding the Ingredients
Each ingredient in this Red Velvet Cake plays a specific role that contributes to its unique texture and flavor. The all-purpose flour provides structure, while the sugar aids in browning and adds sweetness. The cocoa powder, albeit a small amount, supports the cake's characteristic flavor profile by introducing slight chocolate notes. The use of buttermilk not only adds moisture but also reacts with baking soda to create a fluffy texture, essential for achieving that soft, velvety crumb.
Red food coloring is iconic in this recipe, giving the cake its signature hue. While traditional recipes often utilize artificial coloring, feel free to substitute with natural beet juice if you prefer a natural approach, bearing in mind the color may be somewhat muted. For those looking for a richer, deeper flavor, consider replacing a portion of the vegetable oil with melted unsalted butter, which can enhance the cake’s moistness while adding a buttery taste.
Pro Tips for Perfect Results
To ensure even baking and prevent doming, it's crucial to mix the batter just until combined. Overmixing can lead to an overly dense cake that lacks the desired airy texture. When measuring flour, spoon it into the measuring cup and level it off without packing it down; too much flour will result in a dry cake. Pay attention to your oven’s temperature by using an oven thermometer, as even a small discrepancy can significantly affect baking time and the final outcome.
When frosting, it's important that the cakes are completely cool. If they're even slightly warm, the cream cheese frosting can melt and slide off, creating a messy appearance. For a more professional finish, consider chilling the frosted cake for about 30 minutes before serving; this allows the frosting to set slightly, making for easier slicing and serving without the layers shifting.
Ingredients
Gather all your ingredients before starting to ensure a smooth baking process.
For the Cake
- 2 1/2 cups all-purpose flour
- 1 1/2 cups granulated sugar
- 1 teaspoon baking powder
- 1 teaspoon baking soda
- 1 teaspoon cocoa powder
- 1 teaspoon salt
- 1 1/2 cups vegetable oil
- 1 cup buttermilk, room temperature
- 2 large eggs, room temperature
- 2 tablespoons red food coloring
- 1 teaspoon vanilla extract
- 1 teaspoon white vinegar
For the Frosting
- 8 oz cream cheese, softened
- 1/2 cup unsalted butter, softened
- 4 cups powdered sugar
- 1 teaspoon vanilla extract
- 1-2 tablespoons milk (as needed)
Make sure to measure your ingredients accurately for the best results!
Instructions
Preheat your oven and prepare your baking pans before starting on the batter.
Prepare the Oven and Pans
Preheat your oven to 350°F (175°C). Grease and flour two 9-inch round cake pans.
Mix the Dry Ingredients
In a large bowl, sift together the flour, sugar, baking powder, baking soda, cocoa powder, and salt.
Combine the Wet Ingredients
In another bowl, whisk together the oil, buttermilk, eggs, food coloring, vanilla, and vinegar until well blended.
Combine Mixtures
Gradually add the wet ingredients to the dry ingredients, mixing until just combined.
Bake the Cake
Divide the batter evenly between the prepared pans. Bake for 25 minutes, or until a toothpick inserted comes out clean. Let the cakes cool in the pans for 10 minutes, then remove and cool completely on a wire rack.
Make the Frosting
In a medium bowl, beat the cream cheese and butter until smooth. Gradually mix in the powdered sugar and vanilla, adding milk as needed to achieve a spreadable consistency.
Frost the Cake
Once the cakes are completely cool, spread a layer of frosting between the two cakes and then frost the top and sides.
Serve and Enjoy!
Slice your Red Velvet Cake, serve it up, and enjoy the love in every bite!
Remember to store any leftover cake in an airtight container to keep it fresh!
Pro Tips
- For an even richer flavor, consider adding a hint of espresso powder to the batter.
Serving Suggestions
This Red Velvet Cake pairs beautifully with a simple garnish of fresh berries, which not only enhances its aesthetic appeal but also adds a refreshing contrast to the richness of the cake. Consider serving slices with a scoop of vanilla ice cream or a dollop of whipped cream for an indulgent treat. If you want to take it a step further, drizzle a raspberry sauce over each slice to add a fruity tartness that complements the sweetness of the frosting.
For those who want to create a themed dessert table for Valentine’s Day, think about incorporating heart-shaped cookies or chocolate-covered strawberries alongside the cake. This not only enhances the visual display but also provides a variety of flavors for guests to enjoy. Don’t forget, presentation matters; dusting the top of the cake with a light sprinkle of cocoa powder or finely chopped nuts can add an elegant touch.
Storage and Freezing Tips
Leftover Red Velvet Cake can be stored in an airtight container in the refrigerator for up to a week. Ensure it's wrapped well to prevent it from drying out. If you plan to keep it longer, consider freezing it. Wrap individual slices tightly in plastic wrap, then place them in a freezer bag, where they can be stored for up to three months. When ready to enjoy, simply thaw in the refrigerator overnight; this will maintain the cake’s moisture.
If you prefer to freeze the entire cake, it’s best to do so without the frosting. Wrap it in plastic wrap, and then in aluminum foil for extra protection. To thaw, allow it to sit at room temperature for a few hours, then frost before serving. Keep in mind that while freezing preserves taste, the texture can sometimes be slightly altered. Thawing it slowly helps mitigate any changes.
Questions About Recipes
→ Can I make this cake in advance?
Yes, the cake can be made a day in advance. Just store it in an airtight container in the fridge.
→ Can I use a different frosting?
Absolutely! Cream cheese frosting is traditional, but vanilla or chocolate buttercream would also be delicious.
→ Is there a gluten-free version of this recipe?
You can substitute all-purpose flour with a gluten-free blend that measures cup-for-cup.
→ How do I store leftovers?
Store leftover cake in an airtight container at room temperature for up to 3 days or in the refrigerator for up to a week.
Red Velvet Cake for Valentine’s Day
Created by: Isadora Pembroke
Recipe Type: Sweet Inspiration
Skill Level: Intermediate
Final Quantity: 8 servings
What You'll Need
For the Cake
- 2 1/2 cups all-purpose flour
- 1 1/2 cups granulated sugar
- 1 teaspoon baking powder
- 1 teaspoon baking soda
- 1 teaspoon cocoa powder
- 1 teaspoon salt
- 1 1/2 cups vegetable oil
- 1 cup buttermilk, room temperature
- 2 large eggs, room temperature
- 2 tablespoons red food coloring
- 1 teaspoon vanilla extract
- 1 teaspoon white vinegar
For the Frosting
- 8 oz cream cheese, softened
- 1/2 cup unsalted butter, softened
- 4 cups powdered sugar
- 1 teaspoon vanilla extract
- 1-2 tablespoons milk (as needed)
How-To Steps
Preheat your oven to 350°F (175°C). Grease and flour two 9-inch round cake pans.
In a large bowl, sift together the flour, sugar, baking powder, baking soda, cocoa powder, and salt.
In another bowl, whisk together the oil, buttermilk, eggs, food coloring, vanilla, and vinegar until well blended.
Gradually add the wet ingredients to the dry ingredients, mixing until just combined.
Divide the batter evenly between the prepared pans. Bake for 25 minutes, or until a toothpick inserted comes out clean. Let the cakes cool in the pans for 10 minutes, then remove and cool completely on a wire rack.
In a medium bowl, beat the cream cheese and butter until smooth. Gradually mix in the powdered sugar and vanilla, adding milk as needed to achieve a spreadable consistency.
Once the cakes are completely cool, spread a layer of frosting between the two cakes and then frost the top and sides.
Slice your Red Velvet Cake, serve it up, and enjoy the love in every bite!
Extra Tips
- For an even richer flavor, consider adding a hint of espresso powder to the batter.
Nutritional Breakdown (Per Serving)
- Calories: 380 kcal
- Total Fat: 26g
- Saturated Fat: 15g
- Cholesterol: 195mg
- Sodium: 85mg
- Total Carbohydrates: 32g
- Dietary Fiber: 3g
- Sugars: 24g
- Protein: 6g